
Cream Blush Application has revolutionized the way we think about achieving that coveted healthy flush. Gone are the days when powder blush was your only option for adding color to your cheeks. Today’s cream formulas offer something truly special: a dewy, natural looking finish that mimics the glow of skin kissed by cold air or gentle exercise. But here’s the thing. Many of you struggle to get it right.
The product either disappears into your skin within minutes, looks patchy, or creates an unflattering streaky mess. Sound familiar? We’ve all been there, standing in front of the mirror wondering why that gorgeous shade looked so different in the store. The truth is, applying cream blush requires a slightly different approach than its powder counterpart, but once you master the technique, you’ll never look back. This guide will walk you through everything you need to know about cream blush application techniques that actually work. We’ll explore the best methods, tools, and insider secrets that makeup artists use to create that enviable natural glow. Whether you’re a complete beginner or someone looking to refine their skills, you’re about to discover how to make cream blush your new best friend.
Understanding Why Cream Blush Application Matters
Before diving into the how, let’s talk about the why. What makes cream blush so special compared to powder formulas? The answer lies in its unique texture and how it interacts with your skin. Cream formulas contain emollients and oils that blend seamlessly into your complexion, creating a finish that looks like it’s coming from within. This is particularly flattering for those of you with dry or mature skin, as powder can sometimes settle into fine lines or emphasize texture. Think of cream blush as watercolor paint while powder is more like chalk.
One melts into the canvas of your skin, the other sits on top. The natural looking glow achieved with cream products has made them increasingly popular among beauty enthusiasts and professionals alike. But here’s what most tutorials won’t tell you: the key to success isn’t just about the product itself. It’s about understanding your skin type, choosing the right application method, and timing everything perfectly within your makeup routine. Get these elements right, and you’ll achieve that fresh faced radiance everyone will ask about.
Preparing Your Canvas for Perfect Cream Blush Application
Success with cream blush application starts long before you even open the product. Your skin preparation makes or breaks the final result, much like a painter needs a properly primed canvas. First, you need to ensure your moisturizer has fully absorbed into your skin before applying any makeup.
This typically takes about five to ten minutes after application. Skipping this wait time is one of the most common mistakes that leads to patchy, uneven color. Your foundation or tinted moisturizer also plays a crucial role in how well your blush performs. For the most seamless cream blush application, you want a slightly dewy or satin finish base.
If you’re using a matte foundation, cream blush can still work beautifully, but you might need to use a slightly different technique. Here’s a pro tip that changes everything: lightly mist your face with a hydrating facial spray before applying cream blush. This creates the perfect slightly tacky surface that helps the product glide on smoothly and blend effortlessly. It’s like the difference between spreading butter on warm toast versus cold bread. The warmth and slight moisture make everything work better together. Don’t skip this step if you want truly professional results.
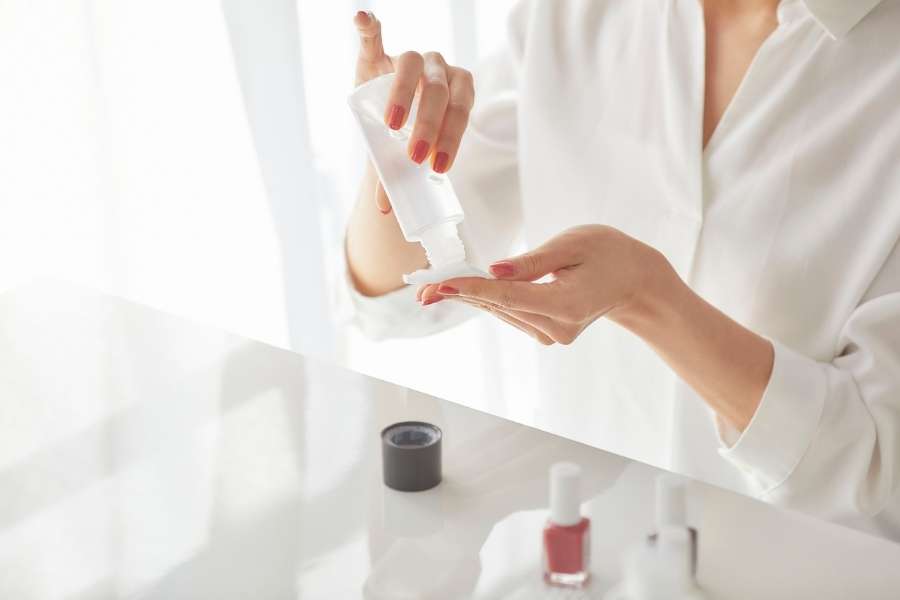
Choosing Your Cream Blush Application Tools
The tool you choose for applying cream blush dramatically affects your final look. Let’s break down your options and when to use each one. Your fingers are actually one of the best tools for cream blush application, especially if you’re a beginner. The warmth from your fingertips helps melt the product into your skin, creating a natural, lived in finish.
This method works particularly well for sheer, buildable coverage that looks effortless. Simply dab the blush onto the apples of your cheeks and gently tap outward and upward toward your temples. The tapping motion is key here because dragging can create streaks or lift your foundation underneath. For those of you who prefer a more polished finish, a dense synthetic brush designed for cream products offers more precision.
These brushes typically have tightly packed bristles that won’t absorb too much product. Apply the blush in small circular motions, building coverage gradually rather than depositing too much color at once. Beauty sponges represent another excellent option for cream blush application techniques. A damp beauty sponge bounces the color onto your skin, creating an airbrushed effect that looks incredibly natural. This method is perfect if you’ve accidentally applied too much product, as the sponge can sheer out and diffuse harsh edges beautifully.
Mastering Basic Cream Blush Application Techniques
Now for the main event: actually applying your cream blush in a way that looks naturally radiant. Start with less product than you think you need. This is absolutely critical. Cream formulas are highly pigmented, and it’s much easier to add more than to remove excess. Think of it like seasoning food while cooking.
You can always add more, but you can’t take it back once it’s there. For a classic, youthful look, smile naturally and apply the blush to the apples of your cheeks. But here’s where most tutorials stop, and we’re going to go deeper. The shape of your face determines the ideal placement for the most flattering result. If you have a round face, apply the blush slightly higher on your cheekbones and blend upward toward your temples. This creates a lifting effect that adds definition.
For longer face shapes, focus the color on the apples of your cheeks and blend horizontally rather than upward. This adds width and balance to your features. The blending technique matters just as much as placement. Use light, feathery motions to diffuse the edges of the color so there’s no visible line where the blush begins or ends. The goal is creating a gradient effect that looks like you’re naturally flushed. Many of you make the mistake of stopping the blend too soon, leaving obvious edges that scream makeup rather than glowing skin.
Advanced Cream Blush Application for a Natural Glow
Ready to take your cream blush application to the next level? Let’s explore techniques that professional makeup artists use to create that enviable lit from within radiance. Layering is your secret weapon for achieving a natural looking glow that lasts all day.
Start with your cream blush applied as we’ve discussed, then lightly dust a complementary powder blush over the top. This sandwich technique locks the cream formula in place while adding dimension and longevity. Choose a powder shade that’s slightly lighter or more muted than your cream to avoid an overly intense look. Another game changing technique involves applying cream blush before your foundation for an incredibly natural flush. Yes, you read that right. Apply the blush directly to clean, moisturized skin, then carefully apply your foundation or tinted moisturizer over it using a damp sponge. This reverses the traditional order but creates a glow that truly appears to come from within your skin.
The foundation sheers out the blush slightly while still allowing the color to peek through. For maximum impact and dimension, try the draping technique where you extend your blush from your cheeks up to your temples and slightly onto your forehead. This creates a cohesive, sun kissed look that’s having a major moment right now. The key is using a light hand and blending thoroughly so the color looks diffused and natural rather than like stripes across your face.
Timing Your Cream Blush Application Within Your Routine
When you apply your cream blush in your makeup routine makes a significant difference in how it performs and looks. The general rule is that cream products should be applied before powder products to prevent a patchy, uneven finish. Here’s the ideal order for a full face of makeup: moisturizer, primer if you use one, foundation or tinted moisturizer, cream blush, concealer if needed, setting powder, and then any powder products like bronzer or highlighter. Notice that cream blush comes before concealer. This is because you can use concealer to clean up or refine the edges of your blush placement. It’s like having a makeup eraser for any mistakes or harsh lines.
However, if you’re going for a minimal makeup look with just concealer and no foundation, apply your cream blush after the concealer has been blended out. The concealer creates a smooth base for the blush to glide over. Setting your cream blush is optional but recommended if you need your makeup to last longer than a few hours. A light dusting of translucent powder just over the blush area helps lock it in place. Be careful not to use too much powder, as this can mattify that beautiful dewy finish you’ve worked so hard to create. Some of you might prefer to skip powder entirely, especially if you love that fresh, glowy look and don’t mind touching up later in the day.
Selecting the Right Shade for Cream Blush Application
Choosing the perfect shade for your cream blush application can feel overwhelming with so many options available. But there’s a simple trick that never fails: look at the natural color your cheeks turn when you’re flushed from exercise or cold. That’s your perfect blush shade.
For fair skin tones, soft pinks, peaches, and light corals tend to be most flattering. These shades provide a natural looking flush without appearing too intense or muddy. Medium skin tones can explore a wider range, including deeper pinks, mauves, terracotta, and warm berries. These shades complement the natural warmth in medium complexions beautifully. Deeper skin tones look stunning in rich berries, plums, deep oranges, and even burgundy shades. The key is choosing colors with enough pigmentation to show up vibrantly on your complexion.
Here’s something important about cream blush formulas: they often appear more intense in the pan than they do on your skin. Don’t let a bold looking shade intimidate you. Remember, you’re building the color gradually with proper cream blush application, so even seemingly bright shades can look surprisingly natural when applied with a light hand. Consider the undertones in your skin as well. Cool undertones pair beautifully with pink and berry shades, while warm undertones are enhanced by peach, coral, and terracotta colors. Neutral undertones can pull off pretty much any shade as long as the intensity matches your natural coloring.
Common Cream Blush Application Mistakes to Avoid
Even with the best intentions, certain mistakes can sabotage your cream blush application efforts. Let’s talk about what to avoid so you can achieve flawless results every time. The number one mistake is applying too much product at once. Cream blush is incredibly pigmented, and a little goes a very long way. Start with the tiniest amount, literally smaller than a pea, and build from there.
You can always add more, but removing excess is difficult and often requires starting your entire face over. Another common error is trying to blend cream blush after your powder has been set. This creates a patchy, streaky mess because you’re essentially trying to move product over a powdery surface. Always apply and fully blend your cream blush before you set your face with powder. Using the wrong type of brush is another frequent mistake. Natural hair brushes absorb cream products, wasting precious formula and making application difficult. Stick with synthetic brushes specifically designed for cream makeup.
Applying cream blush to the wrong part of your cheeks changes your entire face shape. Placing it too low can drag your features down, while putting it too close to your nose can make your face look wider. The sweet spot is typically the highest part of your cheekbone, which you can find by feeling for the bone just below your eye and following it toward your ear. Forgetting to blend the edges is perhaps the most obvious mistake. Always take an extra thirty seconds to ensure the color gradually fades into your skin with no harsh lines.
Maintaining Your Cream Blush Application Throughout the Day
Getting your cream blush application to last from morning until evening requires a few strategic techniques. First, the longevity of your blush starts with proper skin preparation. Well moisturized, balanced skin holds onto cream products much better than dry or oily skin. If you have oily skin, consider using a mattifying primer on your T zone while keeping your cheeks slightly more dewy.
This prevents the oils from breaking down your blush while still allowing it to blend beautifully. Setting your cream blush with a light dusting of translucent powder significantly extends its wear time. Use a fluffy brush and apply the powder with a light hand, focusing on the center of the blush application where the color is most concentrated. For those of you with very oily skin, the sandwich method we mentioned earlier is your best friend. Apply a thin layer of cream blush, set it with powder, then apply another thin layer of cream blush on top. This creates a long lasting, dimensional flush that won’t budge. Throughout the day, avoid touching your face as much as possible.
The oils from your hands can break down the blush and create uneven patches. If you need to touch up, don’t just add more blush to fading areas. Instead, lightly mist your face with a facial spray, let it dry for a few seconds, then gently tap on a small amount of fresh cream blush. This reactivates your base makeup and helps the new application blend seamlessly with what’s already there. Blotting papers are another secret weapon for maintaining your natural looking glow without disturbing your blush. They remove excess oil without removing color.
Adapting Cream Blush Application for Different Occasions
Your cream blush application technique should adapt based on where you’re going and what you’re doing. For everyday wear, a sheer, natural application is ideal. Use your fingers to warm up the product and tap a small amount onto the apples of your cheeks, blending upward and outward.
This creates an effortless, barely there flush perfect for work, running errands, or casual outings. The goal is enhancing your natural coloring rather than making a bold statement. For evening events or photographs, you can afford to be more generous with your cream blush application. Photos tend to wash out color, so what feels slightly more intense in person will photograph beautifully. Build your blush in thin layers until you achieve the desired intensity. Under artificial lighting, slightly warmer shades tend to be more flattering than cool tones. If you’re heading to the gym or engaging in athletic activities, you might think blush is unnecessary. However, a tiny bit of cream blush applied before your workout can actually make you look more polished and put together.
Choose a shade very close to your natural flush, apply it lightly, and skip any powder setting. The natural moisture from your workout will keep the cream blush looking fresh. For special occasions like weddings or formal events, consider the draping technique for maximum drama and dimension. This involves applying your blush higher on your cheekbones and extending it toward your temples, creating a lifted, sculpted effect that looks stunning in professional photographs. Just ensure you blend thoroughly for a polished rather than costume like appearance.
Troubleshooting Your Cream Blush Application Issues
Sometimes despite your best efforts, cream blush application doesn’t go as planned. Let’s solve the most common problems you might encounter. If your cream blush looks patchy or streaky, the issue is usually either too much product applied at once or not enough moisture in your base. Fix this by misting your face with a hydrating spray and using a damp beauty sponge to bounce and blend the color until it looks even.
For future applications, remember to start with less product and build gradually. When cream blush seems to disappear shortly after application, your skin is likely absorbing the oils in the formula too quickly. This typically happens with very dry skin. The solution is layering a slightly more occlusive moisturizer before your makeup and using the powder sandwich technique to lock the color in place. If the blush is moving around your foundation or creating a muddy appearance, you’ve likely applied it over too much powder. Cream products need to be applied before powder to blend properly.
You’ll need to remove your makeup and start fresh, this time applying the blush before setting your face. For those of you finding that cream blush emphasizes texture or pores, try applying it with a damp beauty sponge rather than fingers or a brush. The bouncing motion deposits color without emphasizing skin texture. You might also need to use a pore filling primer in your cheek area before applying foundation and blush. If your blush looks too intense or bold, don’t panic. Gently press a damp beauty sponge over the area to sheer out the color. You can also apply a thin layer of your foundation over the blush to tone it down.
Enhancing Your Look Beyond Basic Cream Blush Application
Once you’ve mastered basic cream blush application, you can use cream formulas to create more complex, dimensional looks. Mixing shades is a technique that adds incredible depth and realism to your natural looking glow. Apply a slightly deeper shade to the hollows of your cheeks, then layer a brighter shade on the apples. This creates the illusion of natural shadowing and highlighting that makes your blush look multidimensional. Don’t be afraid to use your cream blush on other areas of your face for a cohesive, monochromatic look.
Cream blush works beautifully on your lips for a soft, natural tint. Simply dab a small amount onto the center of your lips and blend outward with your finger. You can also use cream blush on your eyelids for a coordinated look, though make sure to use a primer first if you have oily lids. A touch of cream blush on the bridge of your nose creates a sun kissed effect that looks especially beautiful in the summer months. The key is applying just a whisper of color and blending it thoroughly. For those of you who love a glowing look, layering a cream highlighter over your blush creates stunning dimension.
Apply your blush first, blend it completely, then dab a small amount of cream highlighter on the highest point of your cheekbones. Blend the edges where the two products meet for a seamless transition. If you want to experiment with contouring, cream products are actually easier to blend than powder formulas. Use a cool toned cream contour shade beneath your cheekbones, blend it out, then apply your blush slightly above it. This creates beautiful definition while maintaining that natural, skin like finish.
Caring for Your Cream Blush and Application Tools
Proper care ensures your products perform optimally for every cream blush application. Cream formulas can dry out if not stored correctly, so always make sure the lid is tightly closed after each use. Store your cream blush in a cool, dry place away from direct sunlight. Extreme temperatures can change the texture and performance of cream products. If your cream blush seems to have developed a film or harder top layer, gently scrape it off with a clean spatula. This is just oxidation from air exposure and doesn’t mean the entire product is bad.
The formula underneath should still be perfectly usable. For pot or jar formulas, use a clean spatula or brush to scoop out product rather than dipping your fingers directly in. This prevents bacteria from contaminating the product and extends its shelf life. Clean your cream blush application tools regularly to prevent product buildup and bacteria growth. For brushes, wash them weekly with brush cleaner or gentle shampoo, rinse thoroughly, and lay flat to dry. Never dry brushes upright as water can seep into the ferrule and loosen the glue.
Beauty sponges should be washed after every single use since they’re damp and can harbor bacteria. Use a gentle soap or specialized sponge cleanser, rinse until the water runs clear, and allow to air dry completely. Replace your beauty sponge every one to three months depending on how frequently you use it. If you notice any changes in how your cream blush applies or if it starts to smell off, it’s time to replace it. Cream products typically last six to twelve months after opening, so check the period after opening symbol on your packaging.